Affected software version: 1.1.26 and up
Role: Admin
In the cCore system, roles are used to determine different levels of permissions for the user(s). This highly customizable option is what makes this system unique and adjustable to suit each user or group of users and their position within the company. You can create as many roles as you want and a single user can be assigned with more than one role.
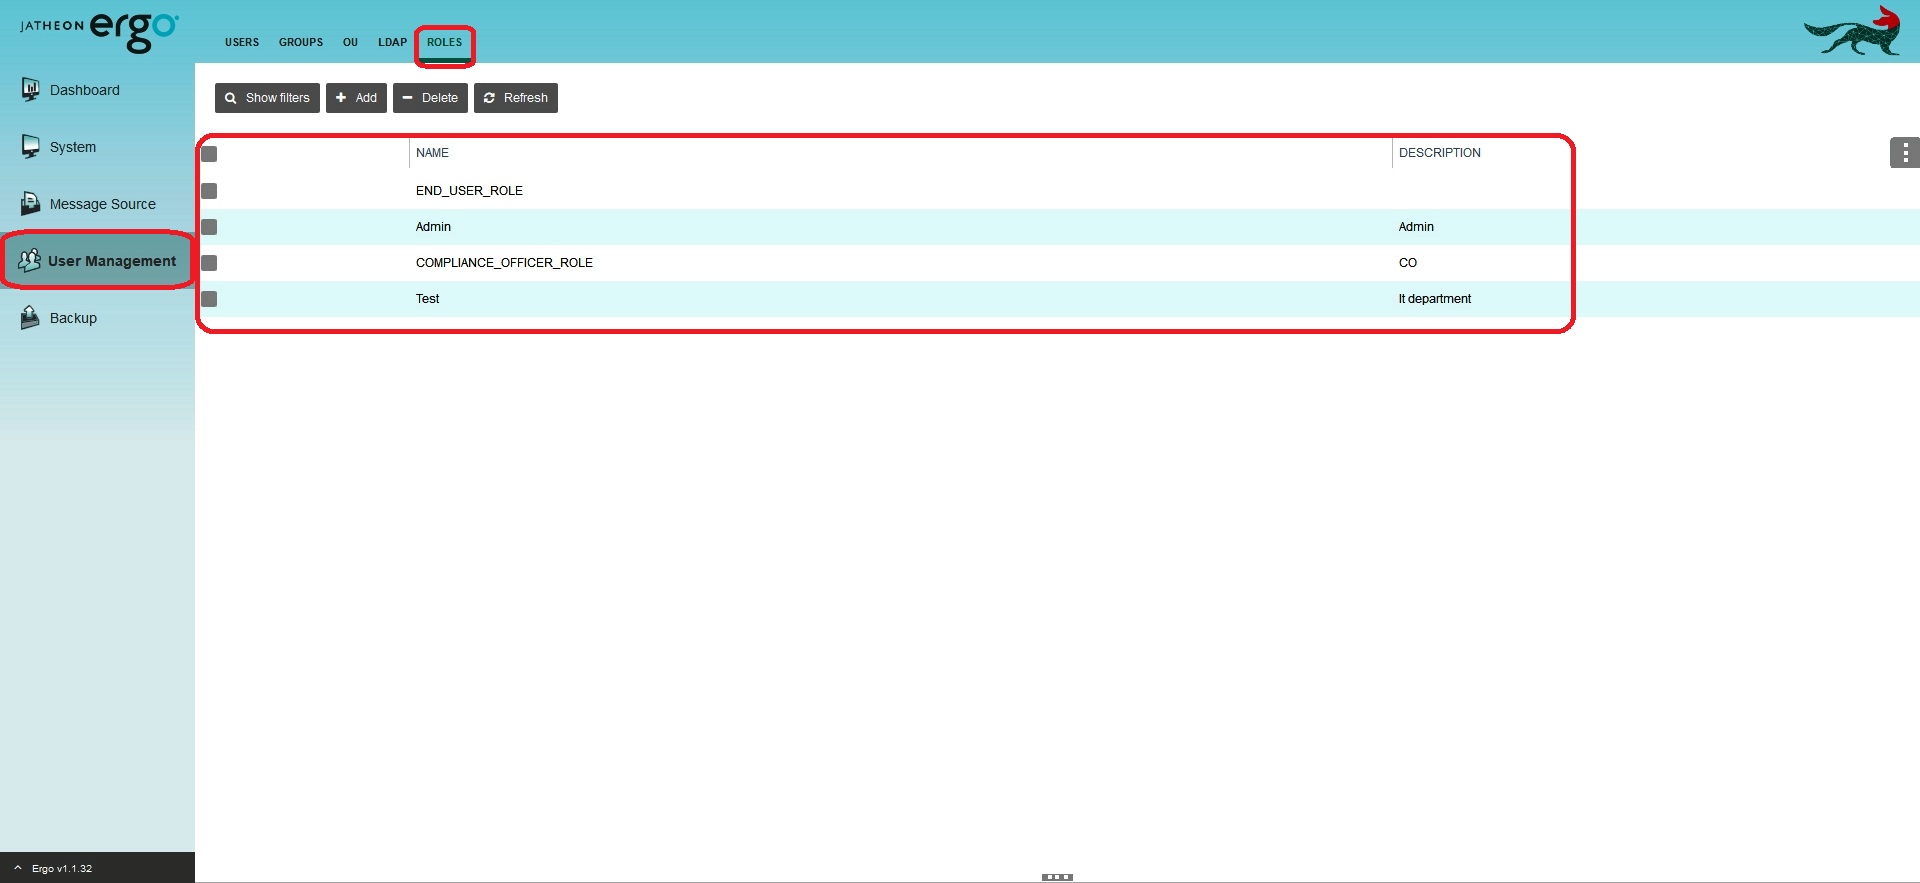
The cCore system comes with 3 predefined default roles: Admin, Compliance Officer and End User.
To configure the Roles on the cCore appliance, please follow the following procedure:
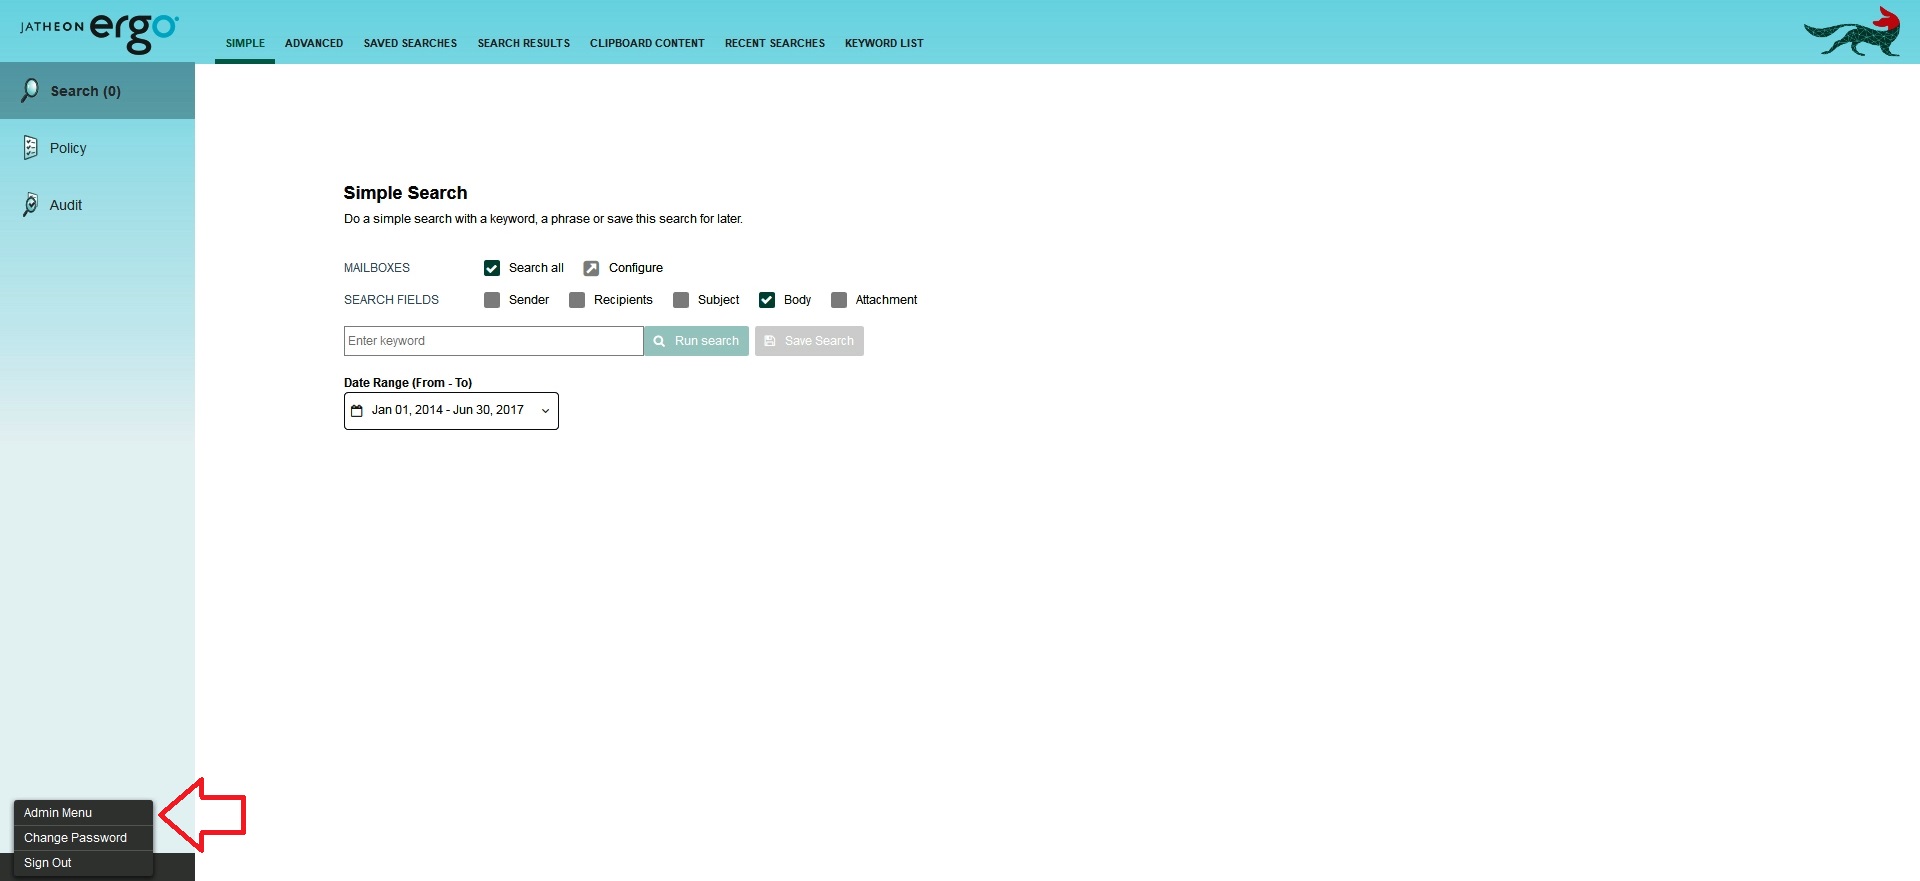
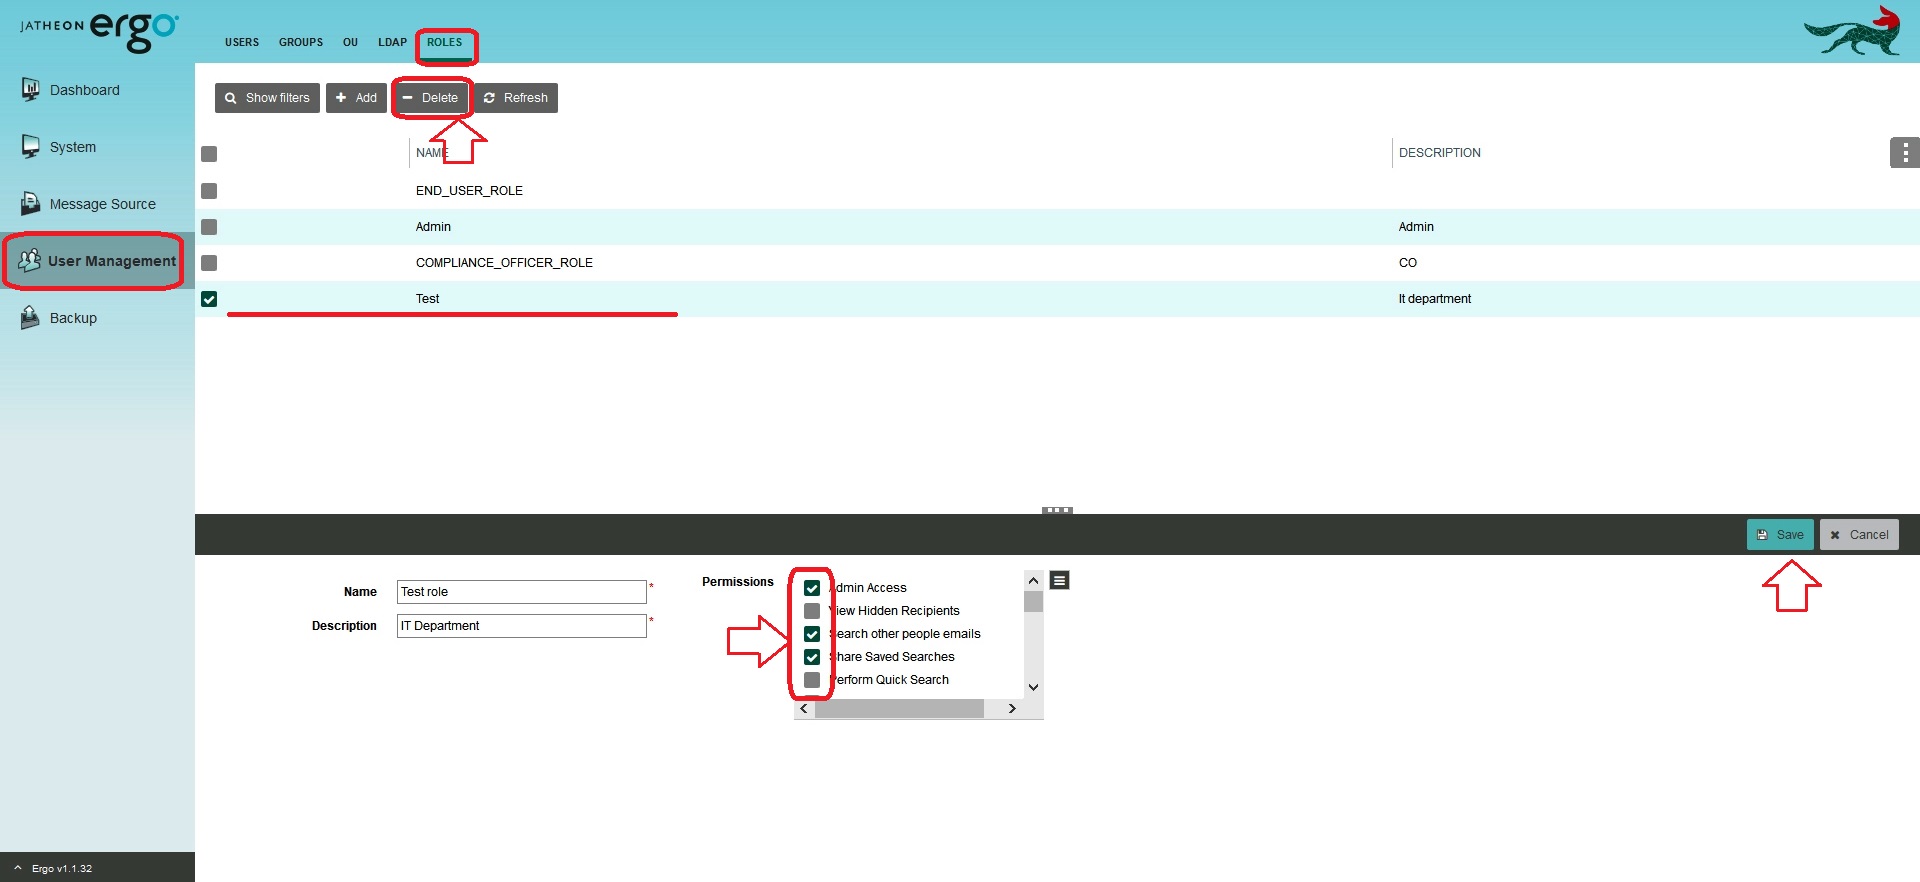
Log in as Admin and go to the Admin menu in the bottom left corner:
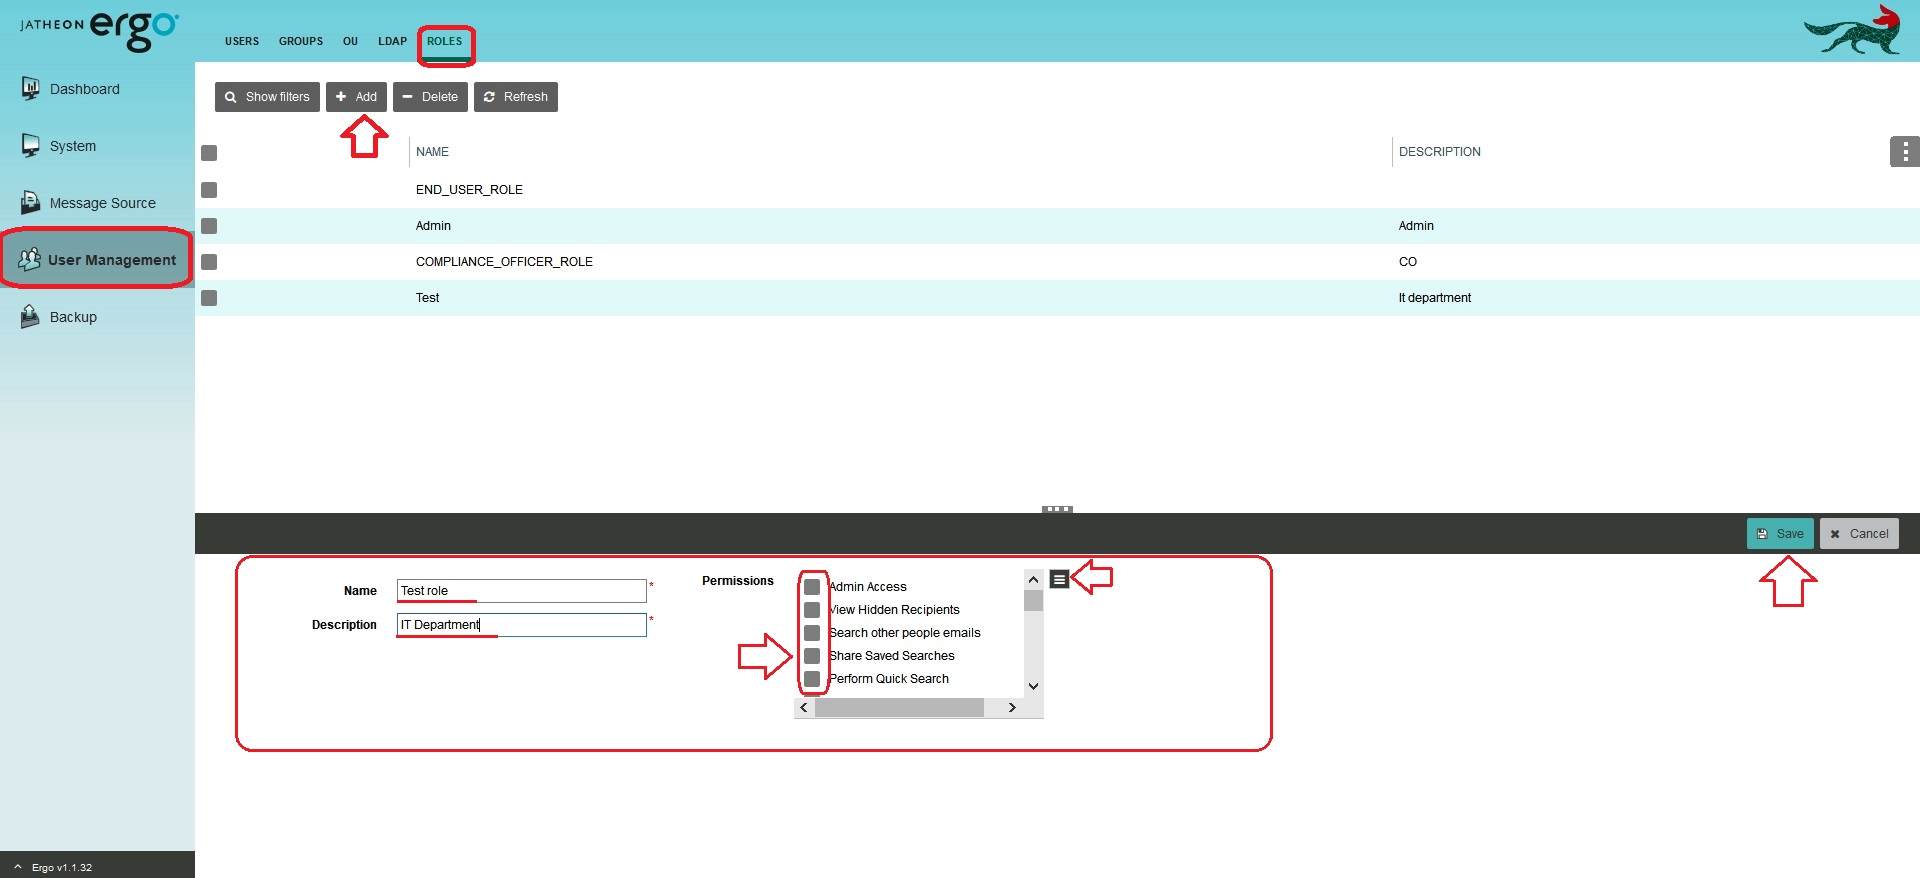
Click on the Add tab and fill in the required fields: give a name to the new role and add a description. Using check boxes on the left, assign the new role with appropriate permissions. User(s) assigned with this role will have limited access to the actions exactly as per your settings specified in this section. In other words, users will/won't be able to perform certain actions. Note that you can use the list view of the actions by clicking on the list icon.
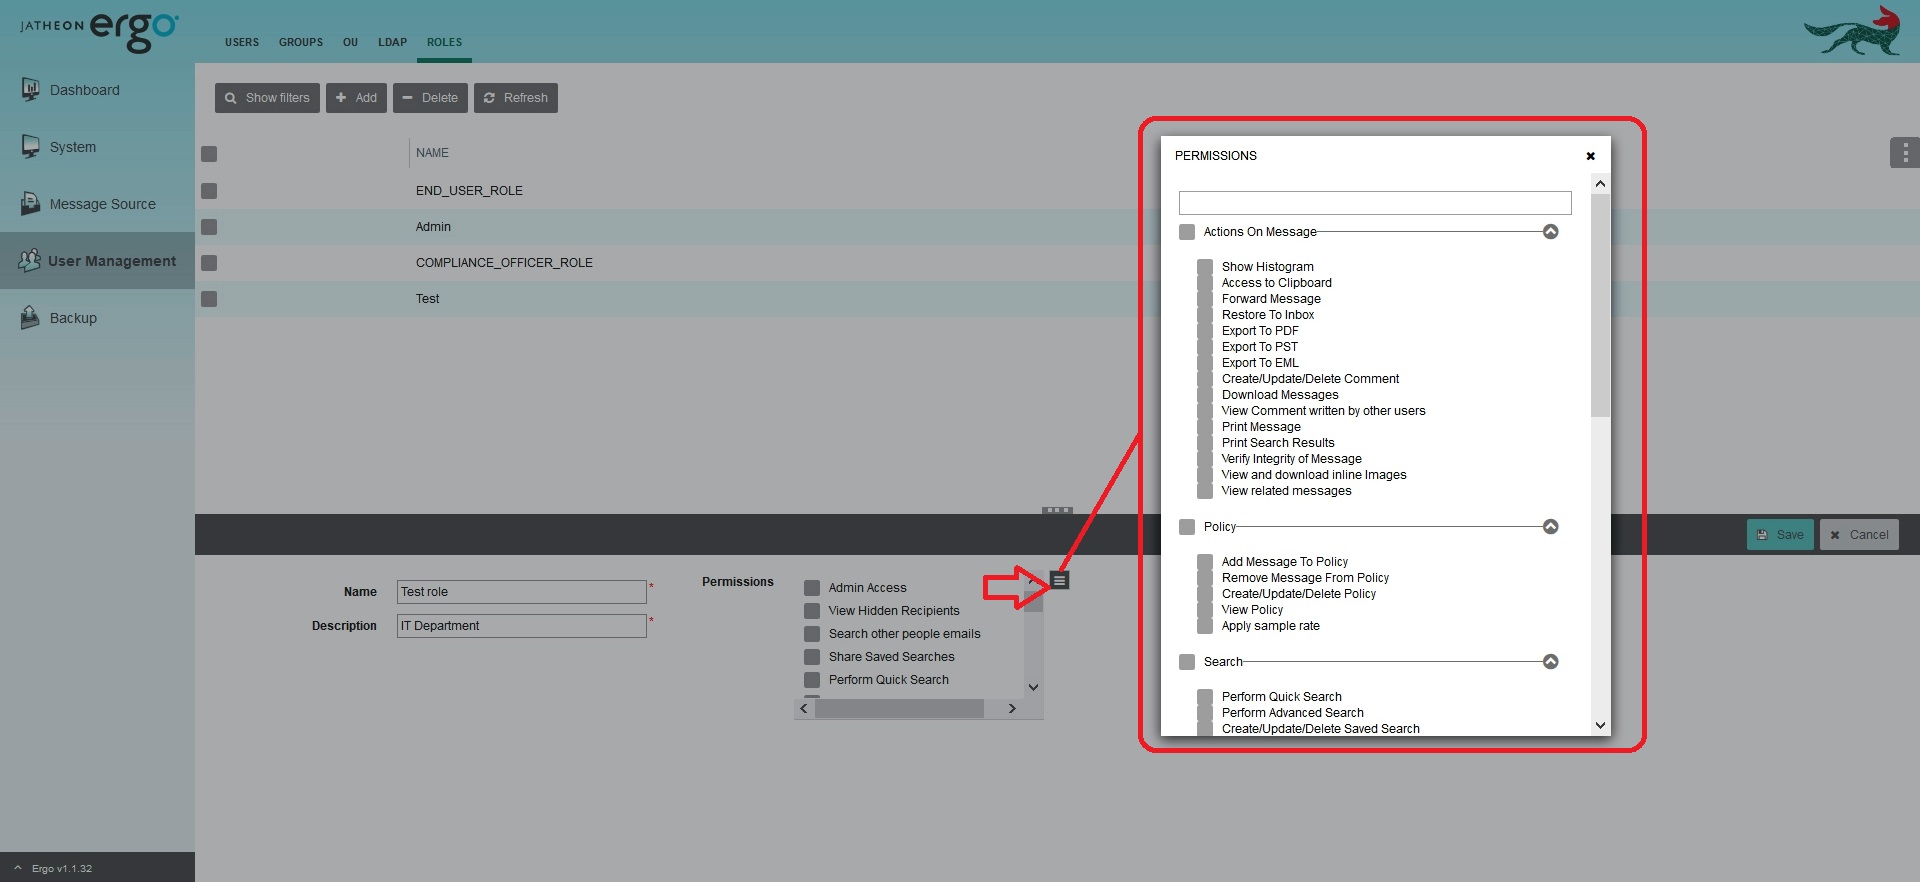
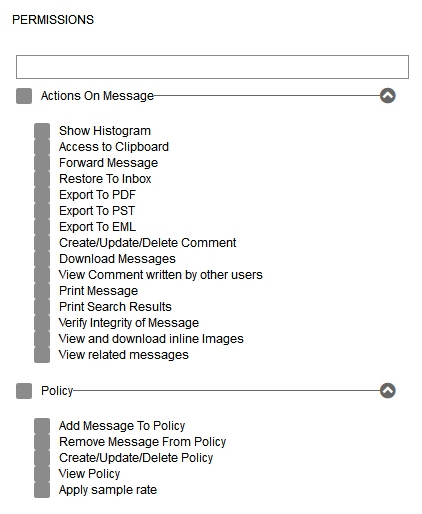
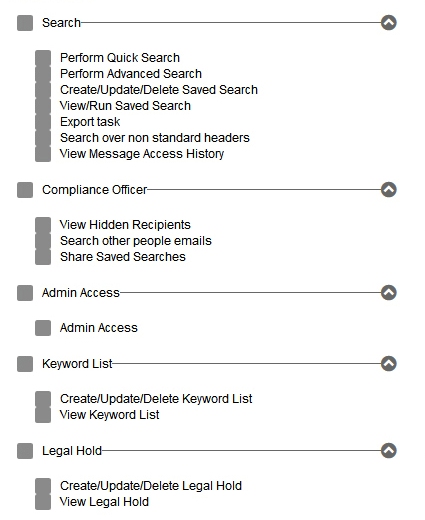
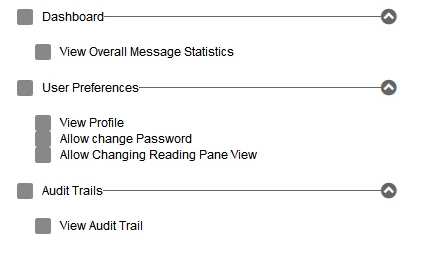
Here is the complete list of actions that you can assign to a role. For an easier overview, actions are divided into sections: Actions on Message, Policy, Search, Admin Access etc.
To delete a role, select the role you want to delete and execute the action by clicking on the Delete button. Instead of deleting the role, you can modify an existing role. Double click on the role and change the settings on the permissions, name, description. Don’t forget to click on the Save button to apply changes.
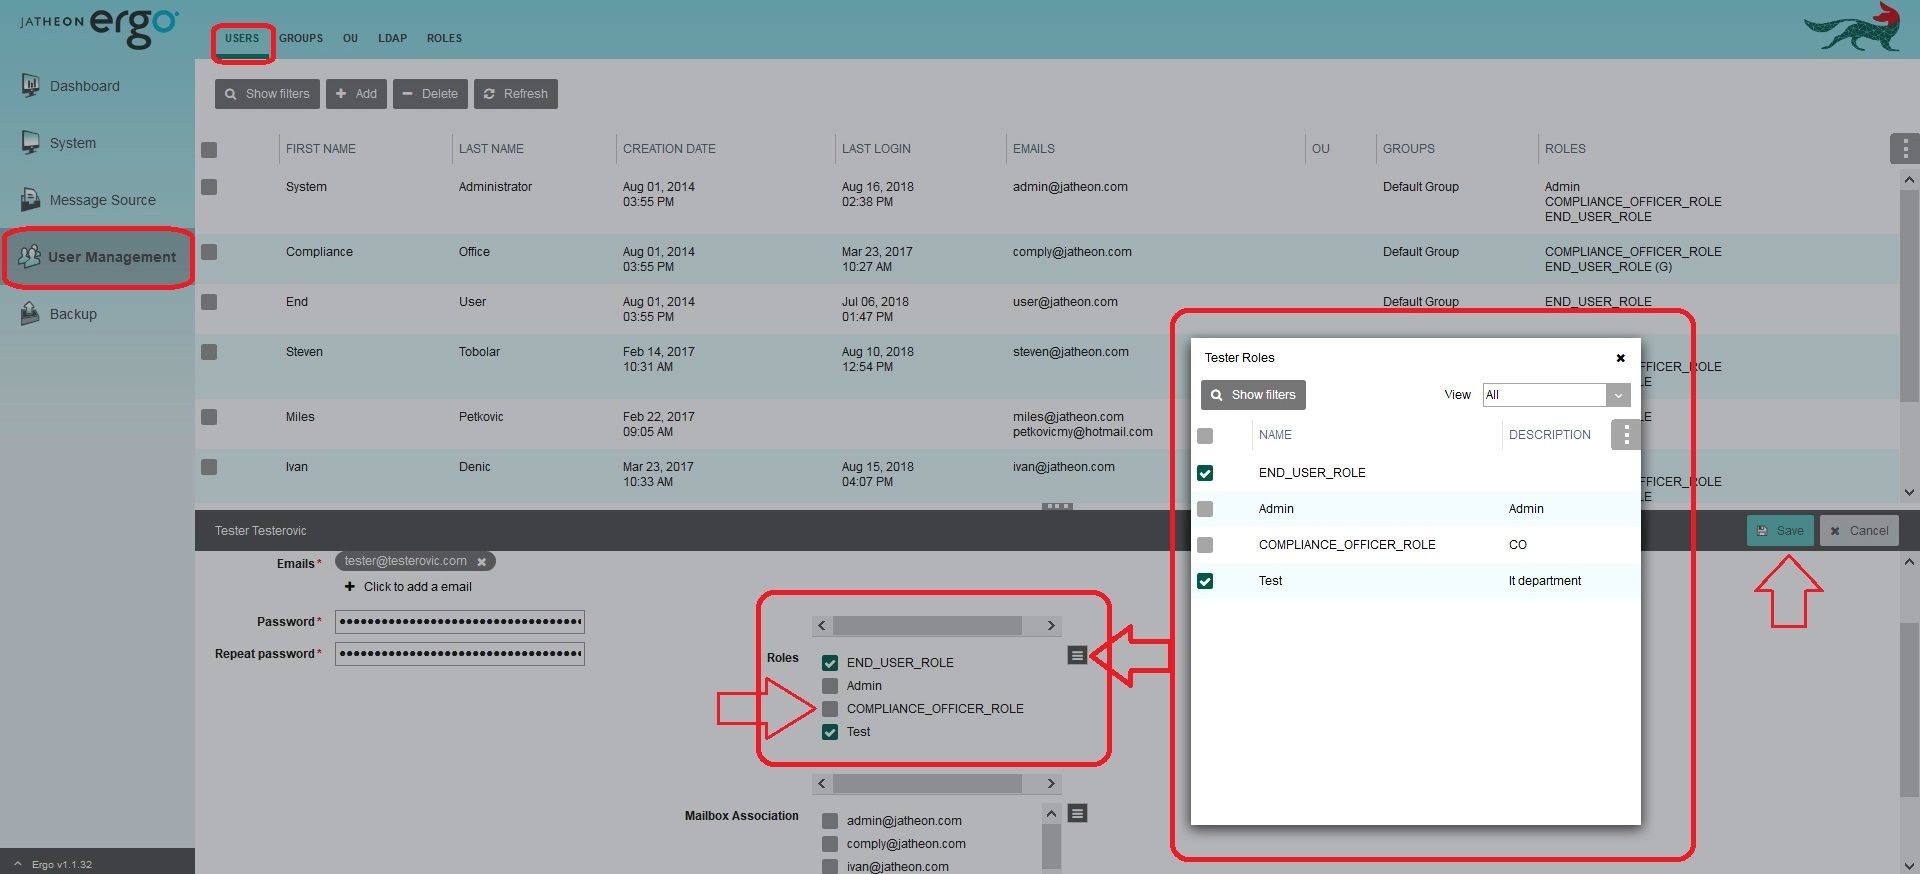
Finally, when the new role is in place, you can select a user and assign him with the newly created role. A single user can be assigned with more than one role.
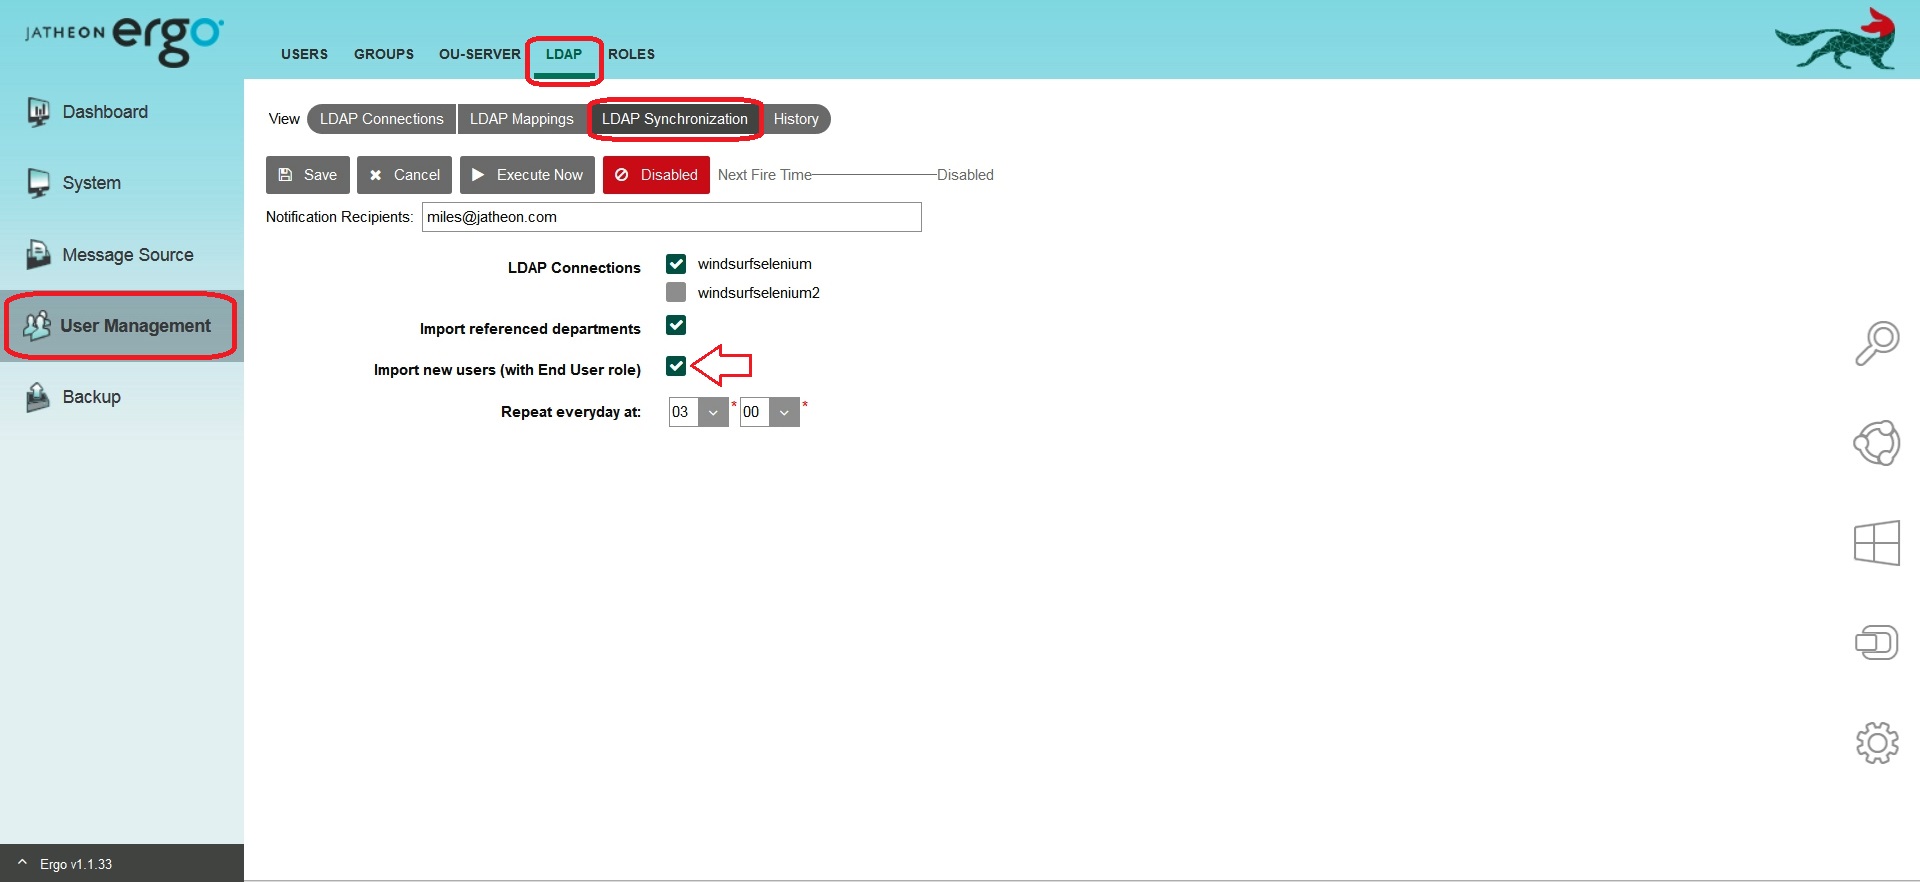
Note that users can be imported and synced with the AD under the LDAP section. User imported from a certain LDAP connection can automatically be assigned with the pre-defined role.
Take a look at the short tutorial video :
Comments
0 comments
Please sign in to leave a comment.